I create a lot of
PowerShell scripts and
source control comes in very handy for replicating the scripts to servers and managing versions and branches.
I discovered
Git many years ago and it works really well for managing PowerShell scripts.
This blog article is a reference for the commands to manage a script repository.
The first thing you need to manage PowerShell scripts using source control is Git. My favorite package for working with Git is the portable version of Git for Windows called
msysgit. Make sure you
download the portable version, although there is nothing wrong with the fully installed version of Git. There are many other popular 'Git for Windows' packages such as
GitHub for Windows and
Posh-Git.
Once downloaded, extract the files and run the '
git-bash.bat' file to get to the *nix based prompt. Notice you will need to use forward slashes
/ rather than back slashes
\ in your file paths including UNC paths. Other *nix based tools are also available here such as 'ls -l' and 'rm' etc.
Once you have Git portable running you will probably need to copy it to any server or workstation that you will be writing scripts or creating repositories with.
The first thing you need to do in the Git bash prompt is tell Git who you are. This will save your user name and email address for assignment to any commits you make withing a repository. You do this with a couple of git config commands. Whilst you are configuring Git you may as well set the default push mode to simple as described
here, otherwise a message will be displayed stating the default is changing in Git v2.0.
git config --global user.name = "Grant Carthew"

git config --global user.email = "your@emailaddress.com"

git config --global push.default simple
You will need to run these commands on each workstation or server you intend to run Git on.
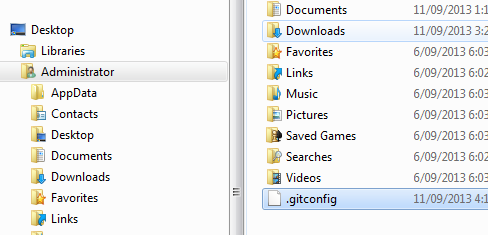
When you run the global config commands a .gitconfig file will be created in the root of your profile. This .gitconfig file holds simple text configurations.
Now that you have Git configured for your workstations and repository file server, let's create a repository to host our PowerShell scripts.
On a file server create a shared folder where you wish to host your Git repositories. I tend to create a folder called GitRepo. This folder will be accessed using a UNC path such as
\\FileServer\GitRepo.
Now on the file server using Remote Desktop, run the Git bash and change directory to the GitRepo root folder. Within this folder create a new folder to host your PowerShell scripts and place a '.git' at the end of the folder name. The '.git' extension is just a convention used for bare repositories. Change directory into the new folder. See the example in the screenshot below where I am creating a Reporting.git repository.
Now the fun part, time to initialize a Git repository. The best type of repository to create on a central file server is a bare repository. A bare repository does not host a working tree which is the Git name for the script files in the root folder. The files in a bare repository cannot be edited because they are hosted in the Git object store. One simple command will make a bare repository.
git init --bare
That's it. You now have a starting point for hosting your PowerShell scripts. Open the folder in explorer if you wish to see the folder structure that has been created by the init command.
There is nothing further to do on the file server. Disconnect your remote desktop session to start working on your workstation.
Run the Git bash prompt on your workstation and change directory to the folder you would like to use for script development. Do not create a folder for the new repository, git will do that with the clone command.
Now that you are in the correct folder in the Git bash, run the following command to clone the file servers repository.
git clone //FileServer/GitRepo/Reporting.git
This command will clone or copy the repository from the file server into a new folder. In this case I am using a folder called Reporting. Notice the '.git' extension is not included in the new folder name. There will be a warning about cloning an empty repository which you can ignore.
If you open the new cloned repository in explorer you will see a '.git' subfolder which is where Git hosts all versions of files in the repository and other configurations. If you ever want to remove Git from this folder, simply delete the '.git' subfolder and it is gone.
Now it is up to you to develop a heap of wonderful PowerShell scripts to weave magic across your server farm. Once you have created the scripts in the new repository folder, it is time to commit them into Git.
One of the best commands in Git is the git status. Run git status now and you will see the new script files you have created in the repository as untracked files.
git status
As untracked files they are not part of the repository and need to be added to Git. This can be done using the git add command. The easiest way to add all the new/changed/deleted files into the repository is to use the git add command with the parameters below.
git add . -A
The above git add command uses the file pattern of '.' meaning all files and folders. The '-A' parameter is short for '--all' and tells git to add all files including removing deleted files. The git add command will not save changes back onto the repository just yet, they are only staged. Run a status command again to see the files staged.
git status
Now that the new script files are staged we can commit them into the master branch of the repository with the following command.
git commit -m "Initial commit for the Reporting repository"
The changed or new files are now committed to the Git repository on your workstation. They have not been saved back to the file server yet. Let's run the status command again just for kicks.
git status
As you can see from the git status report, Git now sees the working tree as clean because all the files in the directory are committed. The git status command is great for letting you know if you have changed files.
You can keep working on your workstation script files if you wish but I tend to like pushing the changes back to the file server after every commit. Because we cloned an existing repository from the file server there is no need to tell Git where the original repository is located. To push the changes up to the file server simply type in this command.
git push origin master
From now on you can simply run 'git push' without the 'origin master' parameters. You can continue working on the script files and commit the changes up to the file server following the same workflow above.
Here is a git status with a new file and a changed file.
So to add these changes into the local and remote (origin) repositories we do the following.
git add . -A

git commit -m "commit message"

git push
Up to now we have been building the repositories and developing the scripts. To use the scripts on a target server you have some
PowerShell Remoting options or you could get a copy of the scripts onto the servers. I find a handy way of working with PowerShell scripts is to store them in a location on the server that is included in the Path environment variable. This way you can call your scripts as if they are cmdlets.
To get a copy of our scripts on to the target machines we can simply clone the file server repository.
git clone //FileServer/GitRepo/Reporting.git
Once the files are cloned onto a server you can run the scripts or update the scripts creating more commits and pushing the changes back to the file server. Note that Git is a fully disconnected utility so it will not tell you if the original repository, the one on the file server, has updated files. Before you run any scripts in a target server repository, always run Git and do a git pull to bring down the latest changes from the origin.
git pull
In the following screenshot of the git pull command you can see I have merged the 'Usage' scripts into a 'Publish-ResourceUsage' script which involved deleting three scripts and renaming one.
All of the above work within Git is using what is called the 'master' branch of the repositories. You can create branches for major changes without effecting the 'master' branch.
I am not going to
explain branching in much detail here. These are the commands you would use for branching just as a quick reference.
git branch webreports

git checkout webreports

*make crazy changes to your scripts*

git add . -A

git commit -m "Created the new web reporting script"

git push origin webreports

*happy with your changes?*

git checkout master

git merge webreports
It probably goes without saying that Git is not designed for PowerShell scripts. It will work with any files you want to manage. Once you start using it and become comfortable with the commands you could use Git to manage all of your scripting and programming source code.
In summary, Git has saved my bacon many times when working with large numbers of scripts and other files.
If you adopt Git two things will happen, you will start to love it, and you will be more efficient at managing your PowerShell scripts.
Lastly, be aware there are public Git hosts you can use for free. Each have a subscription model. I use
GitHub for public hosting although I am not using it much yet. For private Git repositories I use
BitBucket.
[Edit 1] - I just read through
this tutorial on Git and it is one of the best ones I have seen. It approaches Git from a real world point of view and ignores some of the more complex features.